

Welcome everyone to the TFB Armorer’s Bench! As mentioned in the little blurb below, this series will focus on a lot of home armorer and gunsmith activities. In this article, I decided it has been a while since we have done a step-by-step article. This one will be pretty straightforward but hopefully, some Banish 45 owners out there find it helpful. Sometimes suppressor parts cannot or are suggested against using an ultrasonic cleaner which is my typical go-to for cleaning lead and carbon fouling. That is why today we are using the old water and soap method. Let’s dive right into cleaning a Silencer Central Banish 45!
Silencer Central Content on TFB:
TFB Armorer’s Bench: Cleaning a Silencer Central Banish 45
Here, we at TFB hope to inform, entertain, and even inspire any would-be gunsmith or armorer out there. Ideally, with the information I provide and with the help of our sponsors, you can have some useful knowledge pertaining to the conservation and improvement of firearms technology while at the same time sharing experiences and teaching each other new tips and tricks along the way in the comments. Digging deep into what it is to be an armorer or gunsmith has significance but what is important is what those people do to show they’ve earned that title. I am happy to share my experiences and knowledge and hope it is informative!
Make your personal safety a priority:
- Practice proper gun safety. Always make sure before the firearm hits your bench that it is unloaded and safe to be handled.
- Wear the proper safety equipment. The main one would be safety glasses (decent ones) since parts are often under spring tension and you may work with high RPM tools. Other honorable mentions would be latex gloves or a respirator when working with potentially harmful solvents and oils. Also hearing protection when working with loud machinery or test-firing firearms.
- Modifications, alterations, and customizations will void your firearm’s warranty 9.5 times out of 10. Please take that into consideration before attempting any at-home gunsmithing.
- If you are unsure about proper safety practices, disassembly procedures, or warranty standards, stop, put down the tools, and consult a competent gunsmith.
Quick Overview: Cleaning a Silencer Central Banish 45
The Silencer Central Banish 45 is a modular, self-serviceable full auto-rated suppressor. It has a titanium tube and aluminum baffles. It is rated for rimfire cartridges to 45 ACP as well as 300 BLK subsonics. Since it is rated for rimfire cartridges, this means the self-serviceable bit is a necessity given the dirty nature of said cartridges.
I remember hearing in one of their YouTube videos that you shouldn’t put this suppressor in an ultrasonic cleaner. They never specified why but if the Infante S6 that I reviewed last year is anything to go off of, I would guess it has something to do with the finish on the tube and or baffles. Instead, the manual lists a broad and vague spectrum of solvents and bore cleaners which is pretty par for the course.
Cleaning a Silencer Central Banish 45
On the Silencer Central Banish 45’s product page, there is a video describing cleaning it with simple green. That is the route I went. If you yourself have a Banish 45, feel free to follow along.
Note: You may want to wear latex gloves since carbon and more importantly lead deposits form on the baffles. Just be careful not to get too much on your skin.
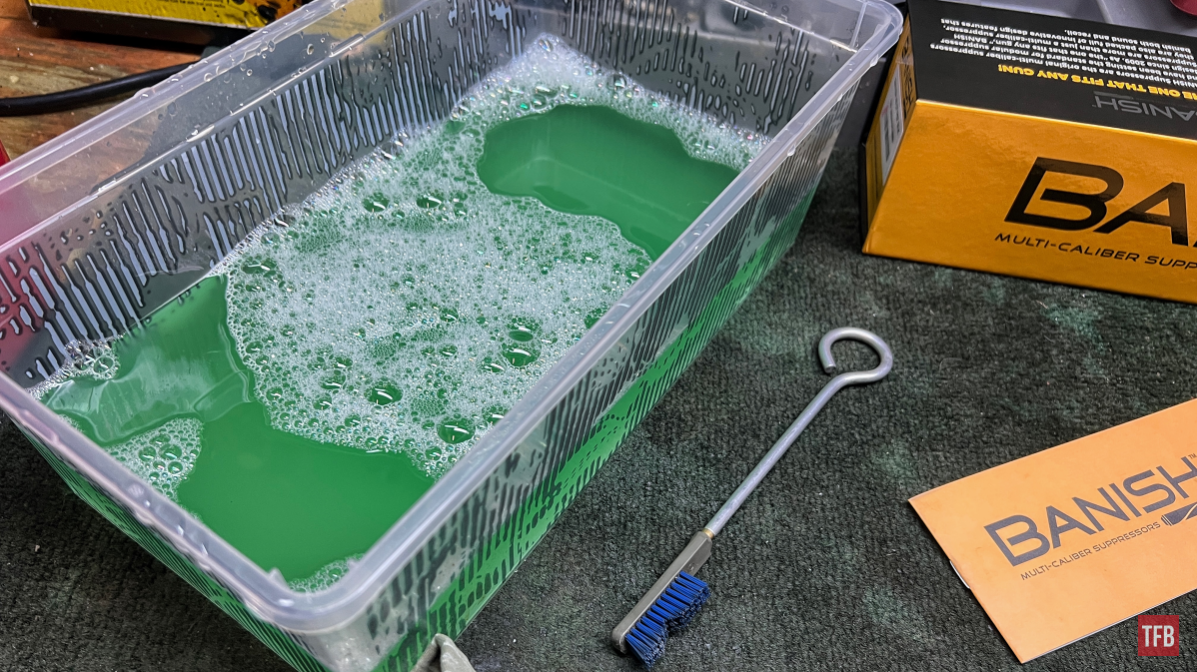
I started by grabbing a tub and filling it with water and simple green. The ratio isn’t too important. I would say more water than simple green is best. Maybe a three parts water to one part cleaner.
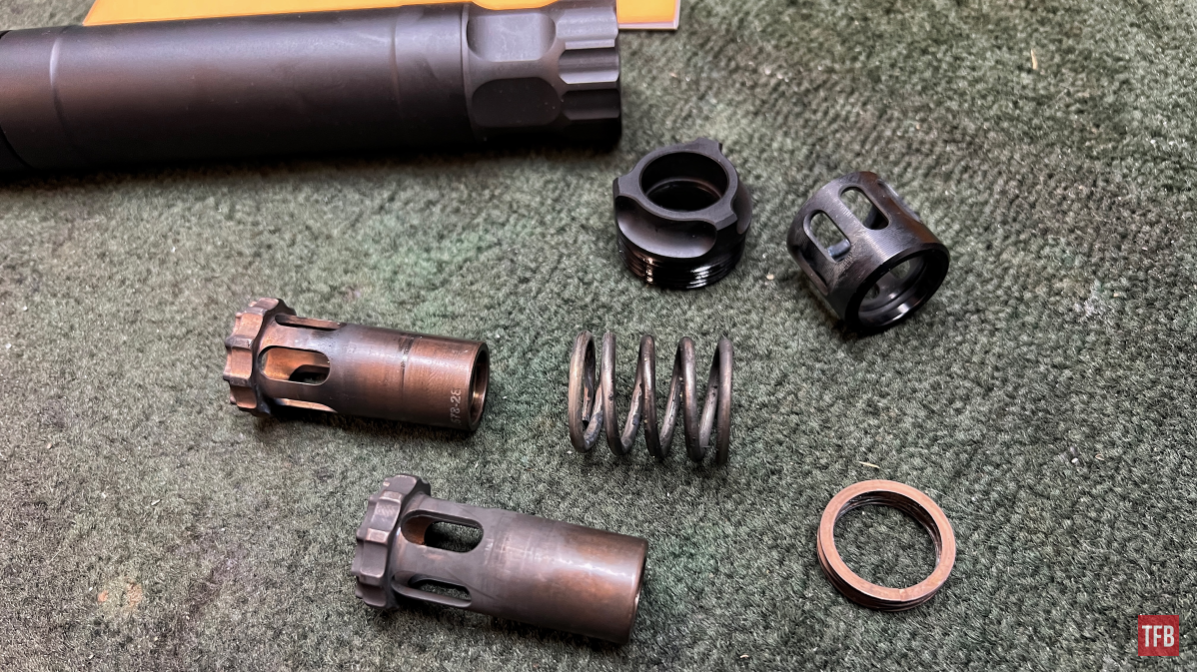
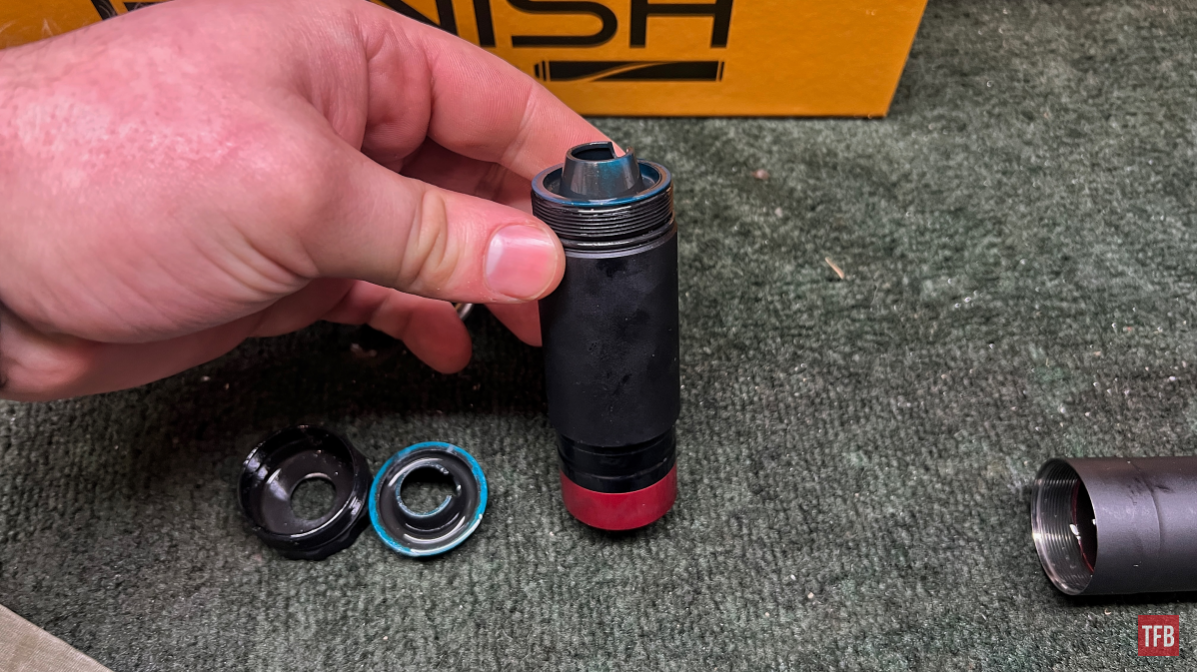
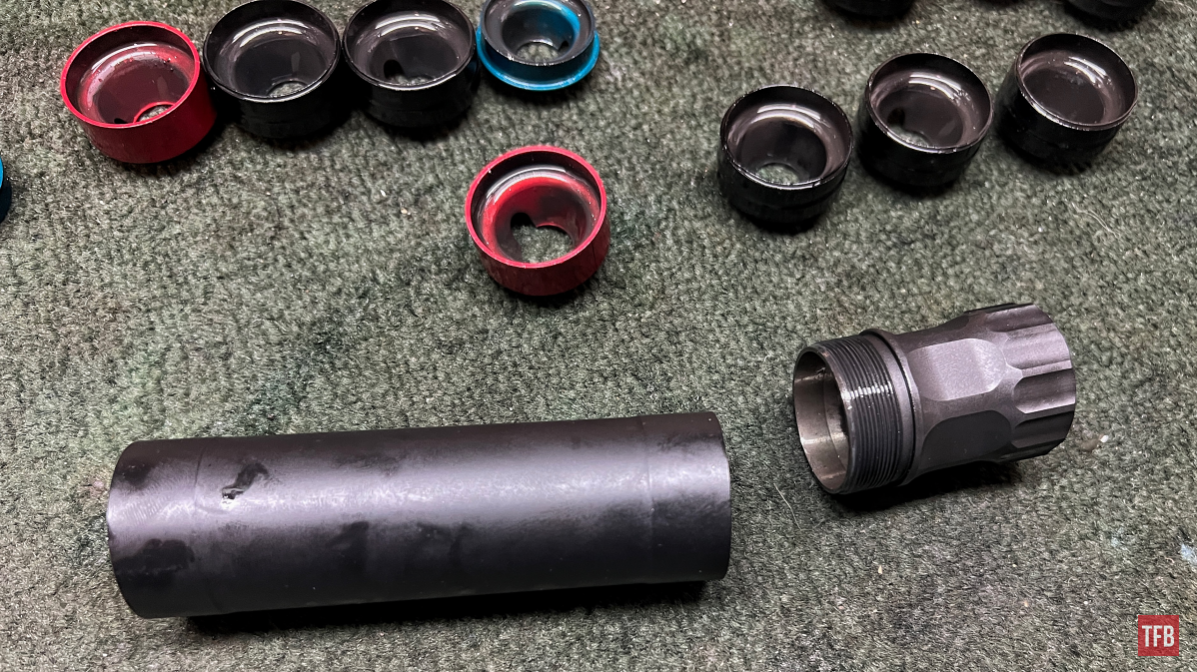
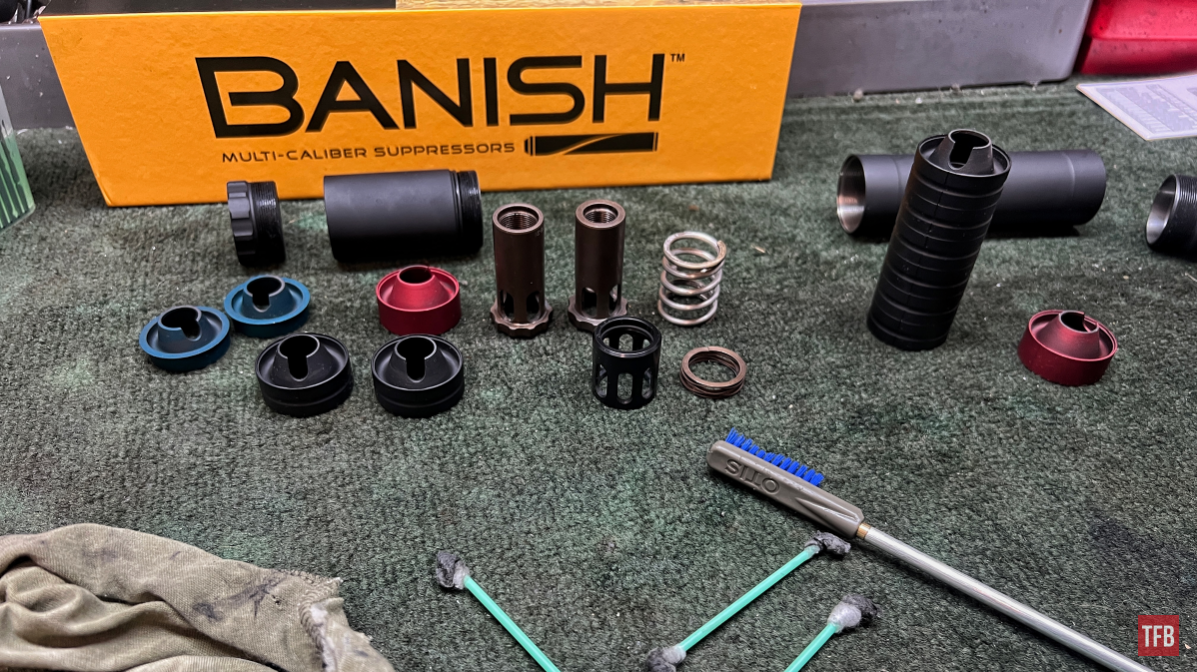
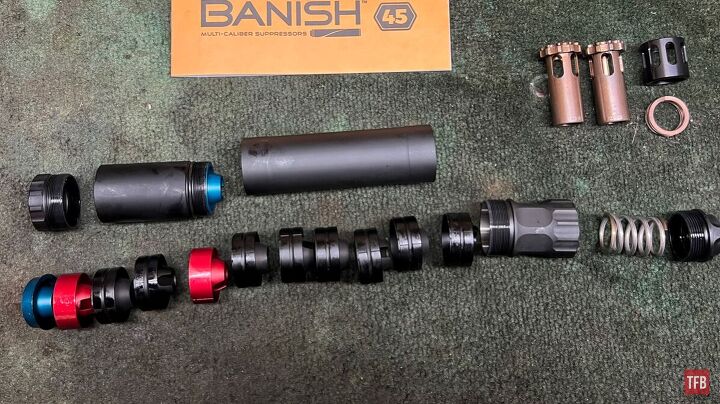
Next, onto disassembling the backend of the Banish 45. I did this by unscrewing the rear cap and removing the piston and piston spring. I also had on hand, another piston, along with a fixed barrel, spacer, and fix barrel spacer spring.
I placed these parts into the tub first. There is no exact time for these to soak. In all honesty, they don’t necessarily need to soak, but it does not hurt.

Next, I sprayed some solvent down into the suppressor. I sprayed a generous amount. I did this, just to ensure that all the baffles come out easily and do not stick to the tube wall.
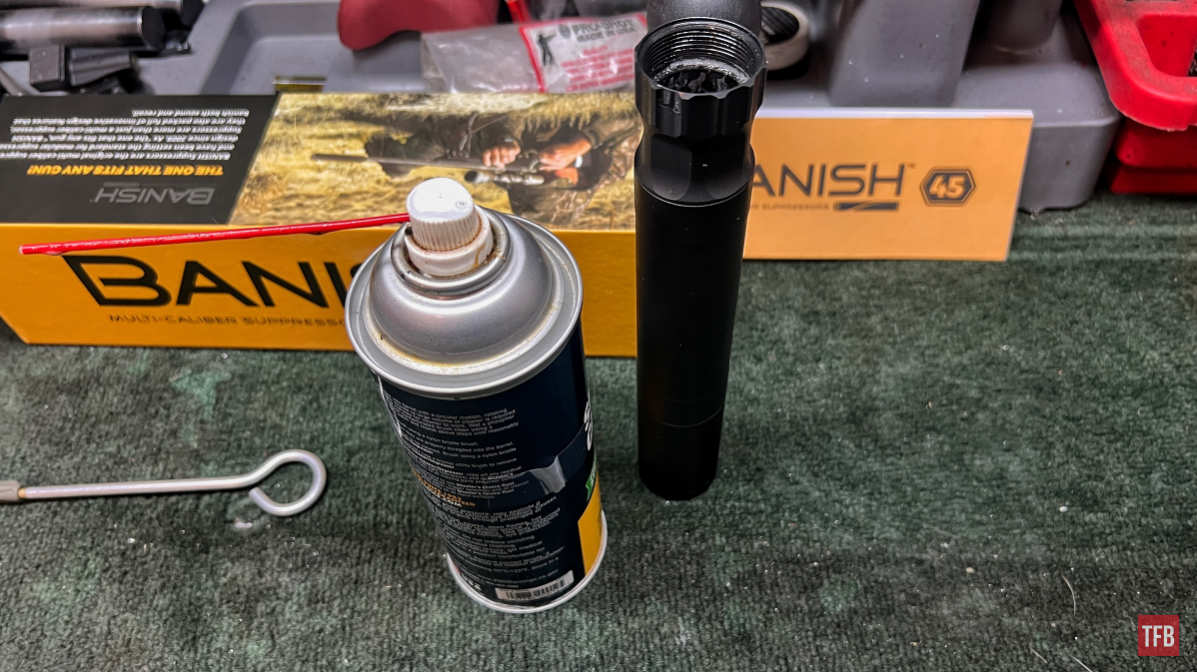
The next step was to screw the front cap.
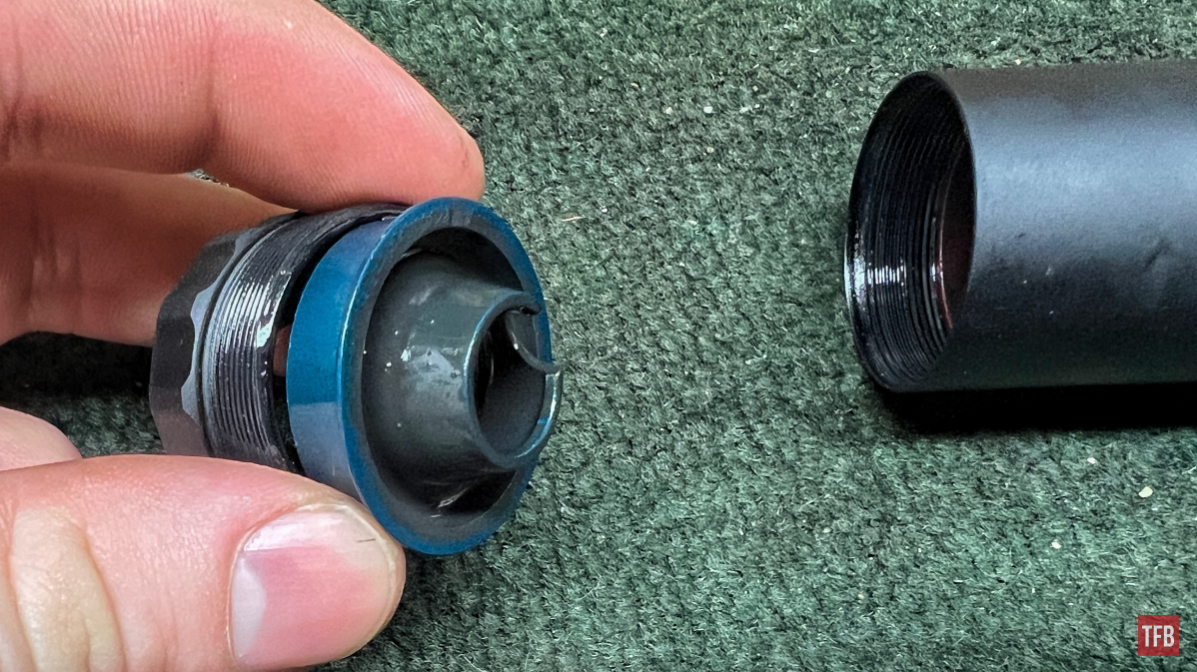
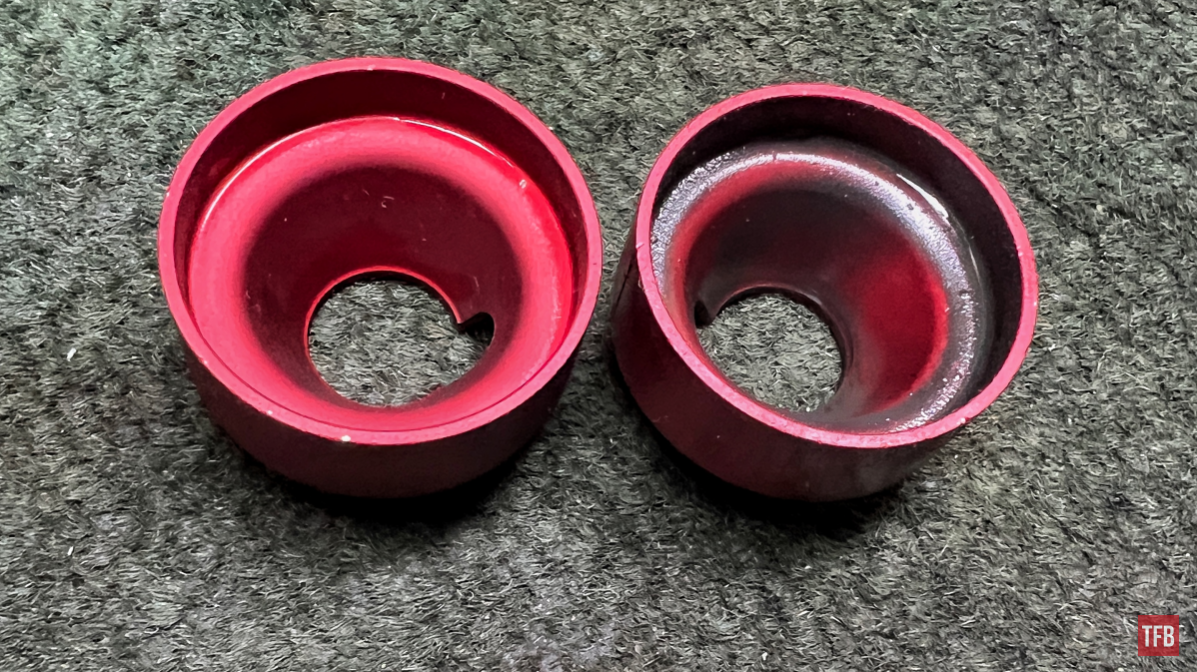
This is a good time to mention that the blue baffle as shown, which is normally press fit into the tube was loose and removed. This is significant since the manual specifies that they should not be removed. Given most of the video content on the Banish 45 on the Internet shows these blue baffles removed I was not too worried.
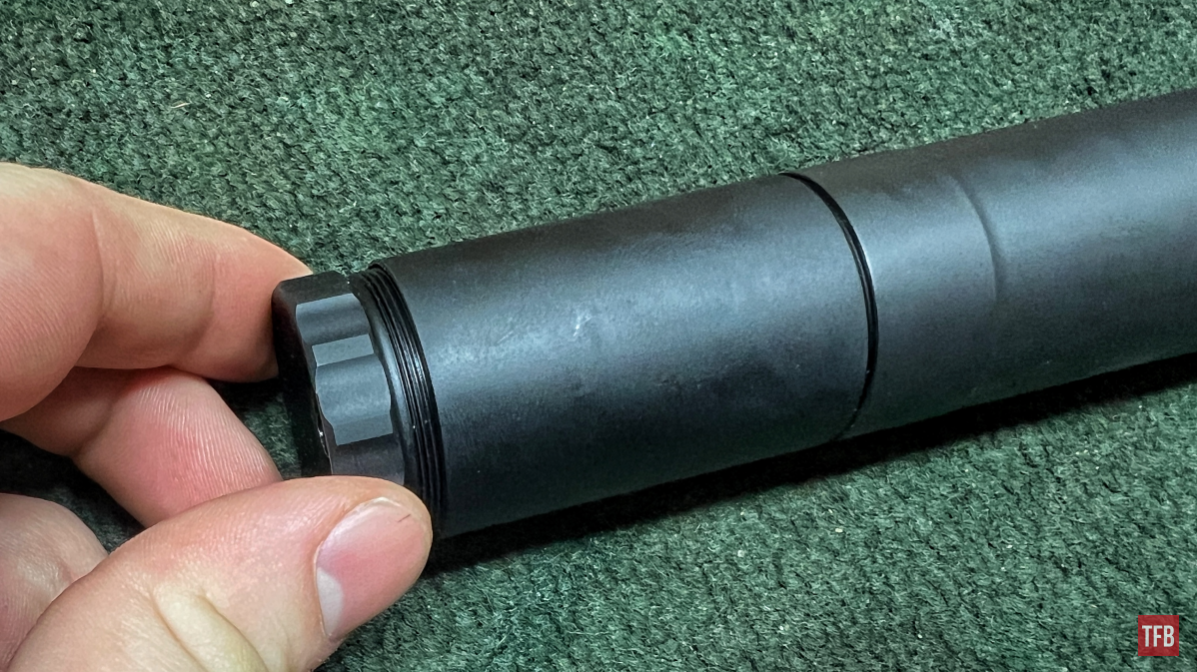
Next, I unscrewed the tube extension.
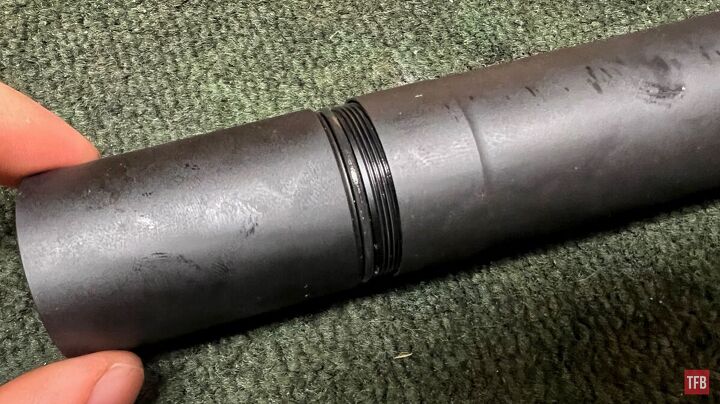
Then tapped firmly on the bench, and let the rest of the baffles fall out.
As you can see, the second blue baffle also fell loose.
Next up, I repeated the step from before and tapped out the remaining baffles in the main tube.
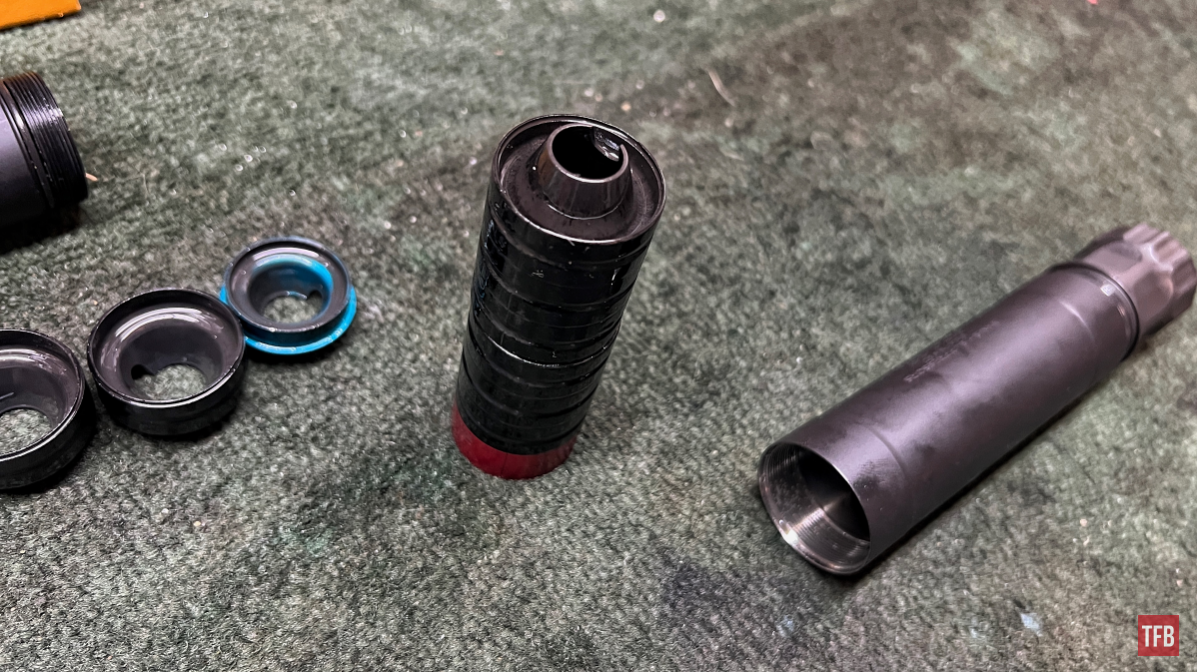
Lastly, I unscrewed the rear of the tube.
Now that everything is completely disassembled, they can all go into the cleaner bath. I let these soak for 10 minutes.
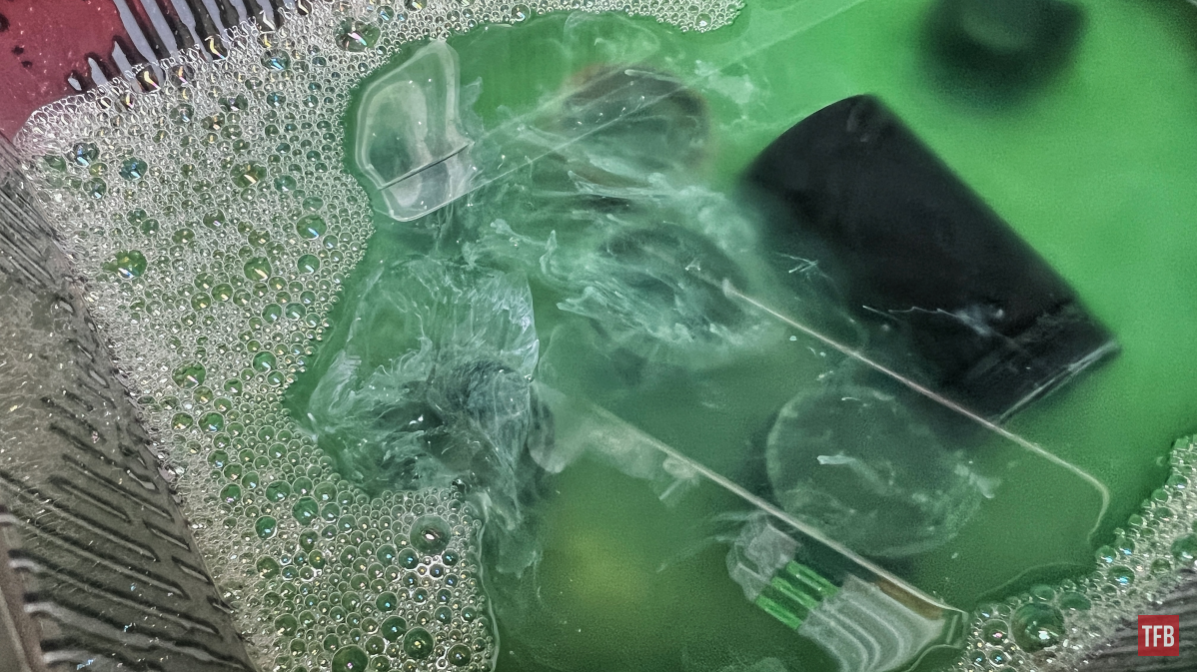
Check out the bullet ghosts caught on camera
I started cleaning the parts that I had put in first. In this case, it was the pistons and fixed barrel spacer parts.
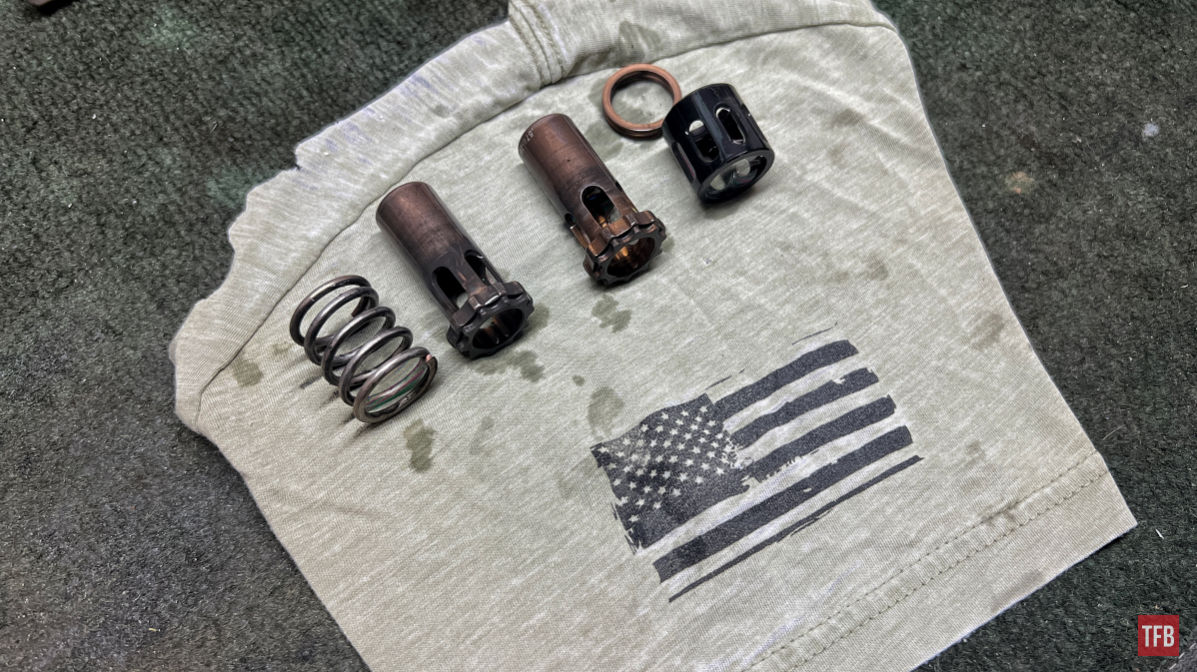
This started a long process of scrubbing everything with a nylon brush. Luckily, nothing strenuous was needed. Some spots needed a Q-tip to get the thicker stuff out of a baffle.
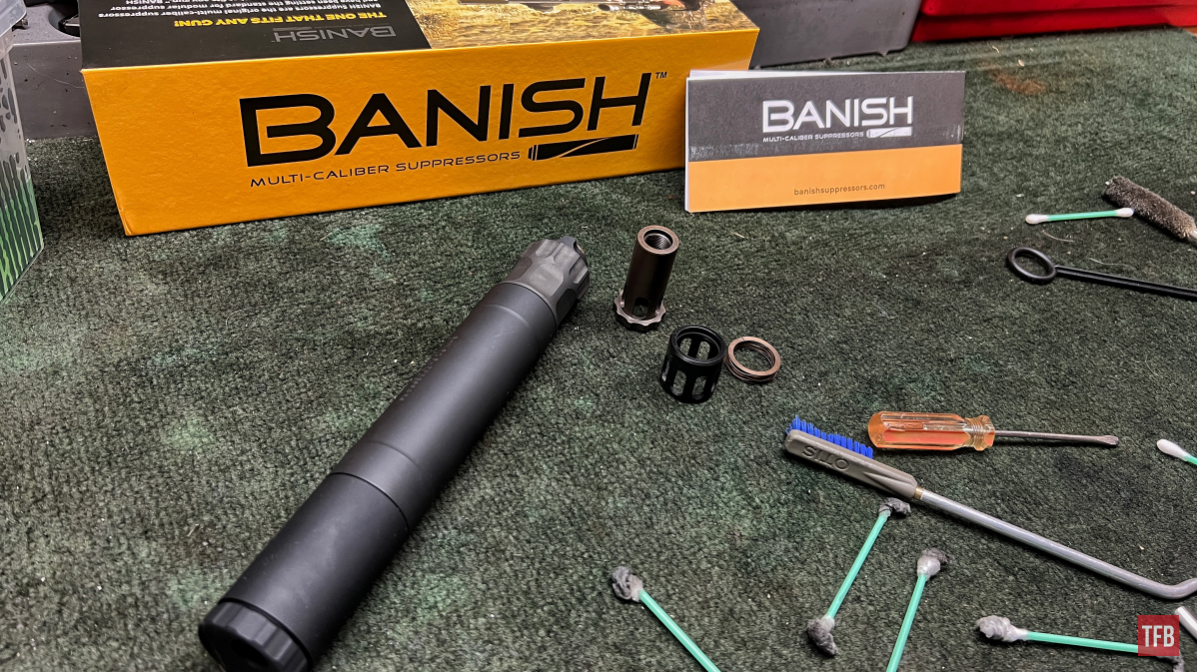
With everything cleaned up, I made sure to dry everything off and took a second to double-check the manual for reassembly tips as well as proper part orientation.
The Silencer Central Banish 45 has keyed baffles. There are notches in the baffles themselves, which interlock with each other. There are witness lines going up the length of each baffle. This helps determine proper alignment.
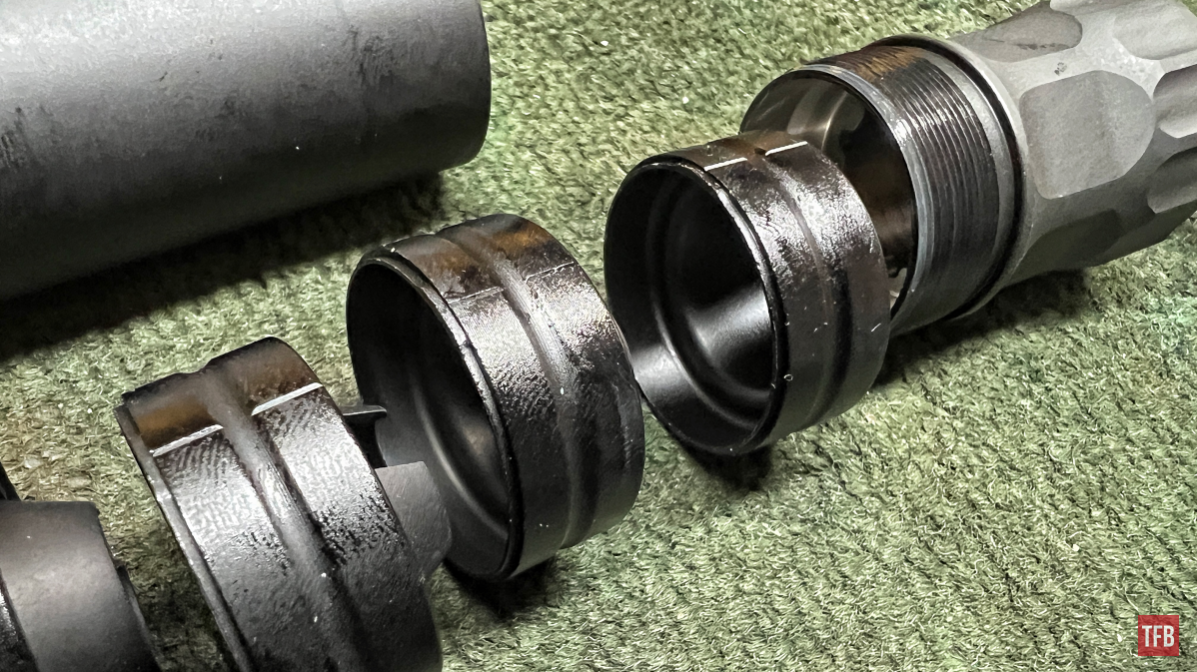
With everything lined, the baffles can be put back into the tube and everything screwed up hand tight.
Final Thoughts: Cleaning a Silencer Central Banish 45
Obviously, this is nothing new or earth-shattering. This is for the guy or gal who may have been hesitant on doing some routine maintenance on their expensive tool that they waited a long while to acquire. Thankfully the Banish 45 is easy to work with and put back together. They recommend doing this quick cleaning after 200 to 500 rounds and potentially sooner if you use dirty ammunition such as rimfire cartridges. See you all next time!
As always, thank you for reading TFB! Be safe out there, have fun while shooting, and we will see you next time for the TFB Armorer’s Bench! Also, let us know what you think in the comments below! We always appreciate your feedback.